Teens recently joined the Field Teen Center and Nourishing Literacy teams for a SWEET Make and Take project!
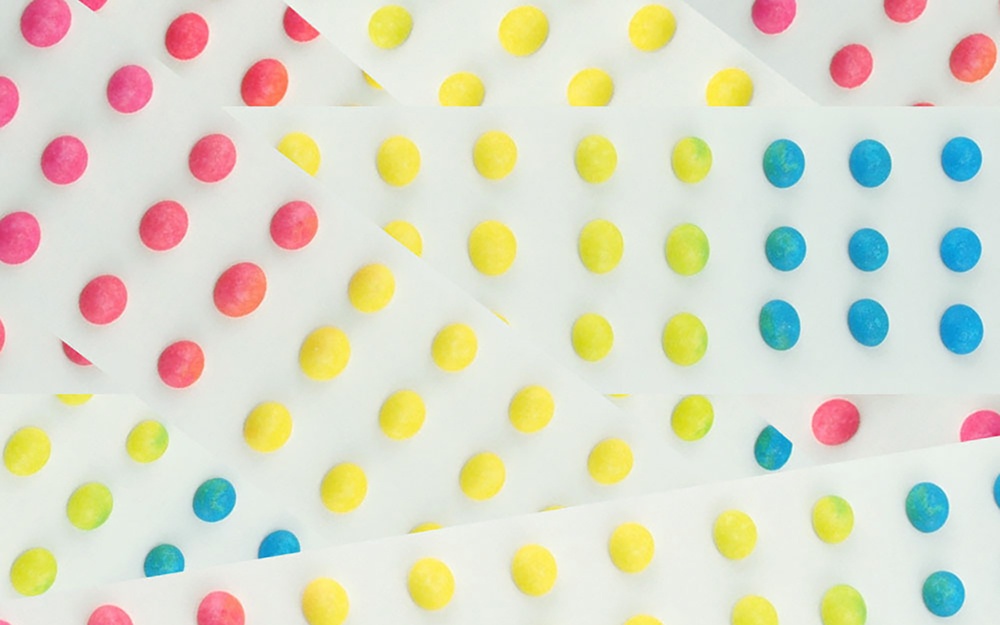
Candy buttons are small dots of colorful sugar candy attached to a strip of paper. It was surprising and cool how simple they were to make from scratch!
Materials
- Parchment or wax paper
- Writing paper
- Permanant marker
- Small bowls
- Small spoons
- Sandwich or freezer plastic bags
- Kitchen scissors or sanitized standard scissors
Ingredients
- 3 Tablespoons meringue powder
- 4 cups powdered sugar
- 7 Tablespoons water
- Food coloring
Instructions
Mix all ingredients together. If possible, an electric mixer is great, but mixing by hand also works! Try to create small peaks as you mix. If the candy mixture is extra dry, try giving it some extra strong stirs to see if everything comes together. If it is still crumbly, add a few drops of water at a time. Be careful not to add too much extra water, because a thick mixture is needed for piping onto the candy paper.
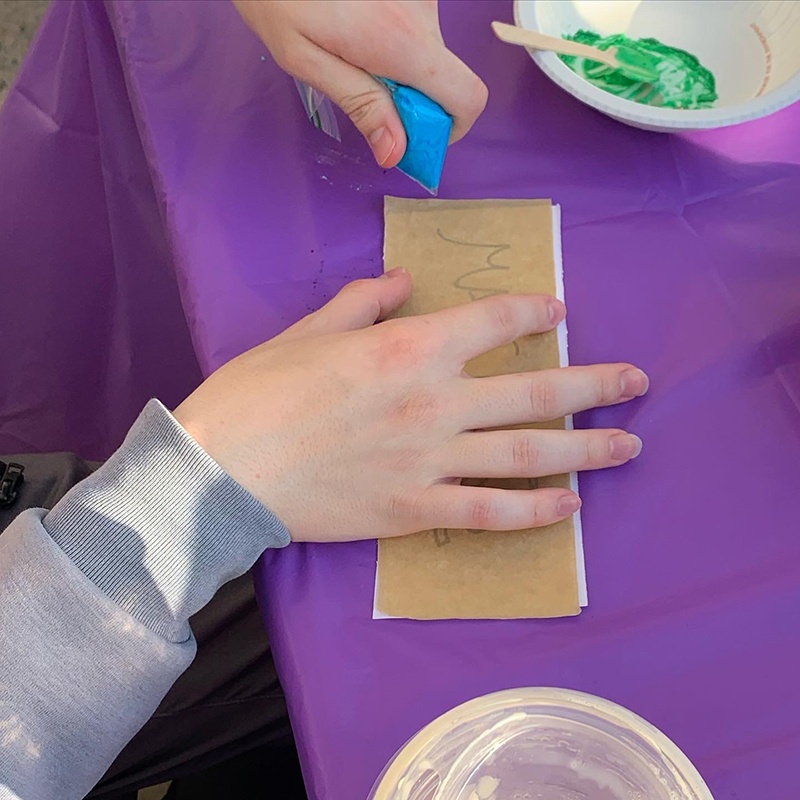
Prepare the paper
- Cut strips of parchment paper or wax paper to place the candies onto.
- Cut strips of writing paper, the same size as the parchment or wax paper.
- Using the permanent marker on the writing paper, draw dots (or any other design!)
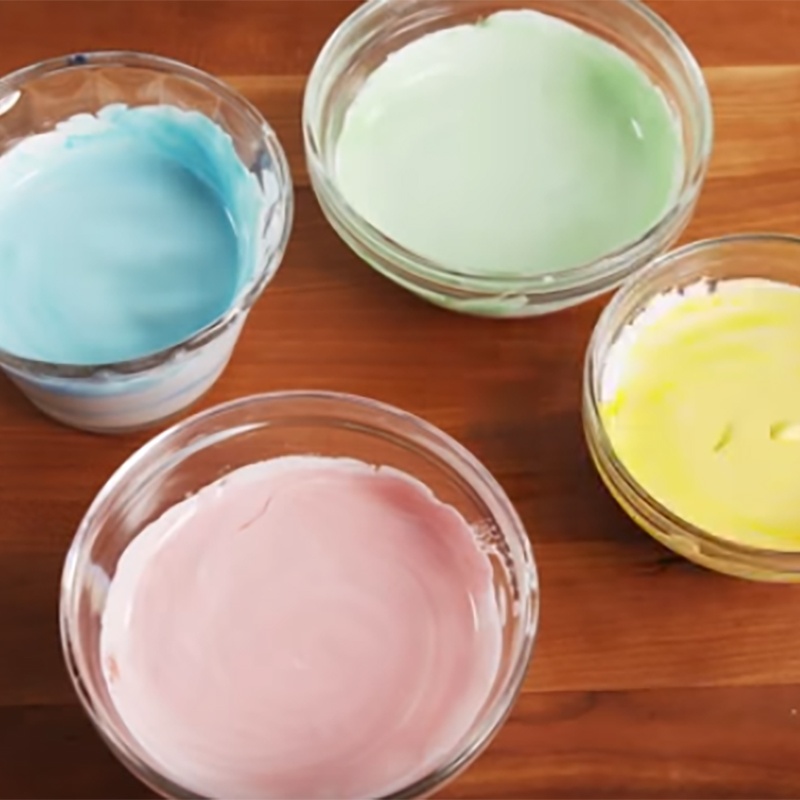
Prepare the candy mixture
- Decide how many colors you will be creating.
- Place a scoop of candy mixture in the number of bowls that matches the number of colors.
- Add a few drops of food coloring to each bowl and stir.
- For each color, roll down the opening of small plastic bag to create a piping bag. Place the candy mixture toward a bottom corner of the bag. Watch this DIY piping video for ideas and inspiration!
- On the side where the candy mixture has been placed, cut a very small corner off of the bag.
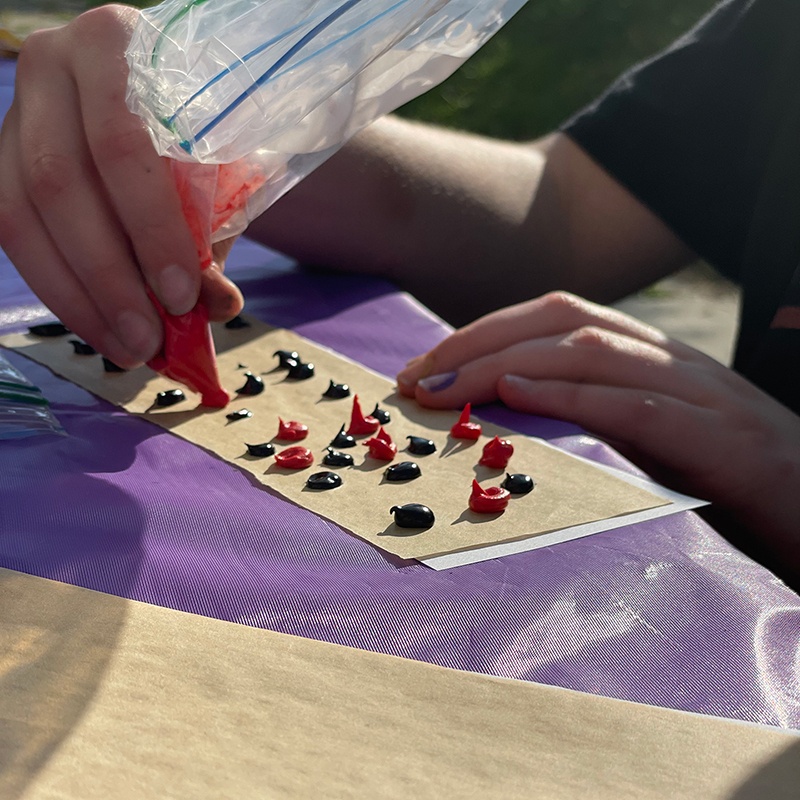
Place the candy on the paper
- Draw dots or other shapes on the strip of writing paper using the permanent marker.
- When finished drawing, place the parchment or wax paper over this paper.
- Pipe the candy mixture onto the parchment or wax paper, following your design.
- Repeat this process as many times as you would like.
- Let the candy dry uncovered for 4 to 6 hours.
Here's another idea to try if there is any candy mixture leftover: place in a tightly sealed container in the fridge for 3 to 5 days. The mixture will be very thick, but will not harden when storing it this way. It resembles and tastes like Oreo cookie cream! Try making your own version of sandwich cookies using this as your filling!
If interested in picking up a candy button kit from Parkway Central Library to recreate this recipe, please contact us at kitchen @ freelibrary.org and we can arrange a pick up with you!
Here are some additional videos full of inspirations and activities!
For more candy inspirations for Halloween, check out some of our friends' blog posts! Lane teaches us how to make another old-fashioned candy called Mary Janes, and Peter has a candy music mix to share!
Wishing you happy cooking and creating!
Nourishing Literacy offers food, literacy, wellness, and life skills activities and events to community members, with our core audience being the children, youth, teachers, and caregivers. Nourishing Literacy is made possible in part by a generous grant from the Edna G. Kynett Memorial Foundation.
To learn more about the Culinary Literacy Center, please visit our website or connect with us through Instagram and Facebook.
Have a question for Free Library staff? Please submit it to our Ask a Librarian page and receive a response within two business days.